Loopy is on sale Loopy is on sale
  • Home
  • Posts
  • Home
  • Posts

Loopy is on sale

_media_images_products_loopy_screen-iphone.jpg
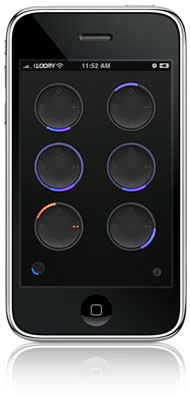
Loopy, my loop-based musical instrument and musical notepad app, is going on sale in anticipation of Loopy 2, which is on its way, with a release expected a little later this year.

Here’s some recent feedback on Loopy (about which I’m thrilled!):

  • Loopy does more of what I wanted than my Boss looper pedal that I paid £180 for! CUJ1mmy
  • This app lets me get creative. The timing and sync is perfect and has a very polished interface. Joza coza
  • This is an example of someone going the extra mile to take advantage of what the iPhone can do – a refreshing change from the 1000’s of apps that all look, sound, and probably taste, the same. Apple – give this guy a job! Gerry

Grab Loopy for half price on the iPhone App Store!

Read More

Keeping blog visitors by showing meaningful search results in WordPress

I recently became disgruntled with the way my blogs displayed search results. By default, WordPress blogs will show searched posts exactly as they might appear on an index or archives page: Typically as an extract, or perhaps even as the full entry.

This doesn’t help at all if you’re looking for something in particular – It’s a much better idea to show the post within the context of the search query, as real search engines do.

See it in practice here.

This is a fairly easy thing to actually get working in WordPress. It’ll take just a couple of minutes, and will make a big difference to blog visitors. Here’s how I did it.

Read More

Links for February 25th through May 29th

Links for February 25th through May 29th:

  • Implementing iBooks page curling using a conical deformation algorithm Excellent summary of how to implement a convincing page turn animation in OpenGL
  • Multiplottr.com — Plot, save and share multiple locations on your own customized maps. Batch plot multiple addresses
  • gmaps.kaeding.name :: Plot multiple locations on Google Maps Enter addresses, one per line, to plot all entries on a map at once
  • Free iPhone App Marketing — Online and iPhone Marketing Includes a useful list of review sites, blogs, etc.
Read More

OS X service to filter selected text through a shell command

The UNIX shell provides a host of extremely useful utilities for modifying text. This OS X Automator service makes all of them available for filtering text in all OS X applications.

This can be handy for performing quick operations, like replacing text with regular expressions, sorting lists or swapping fields around.

When triggered, the service requests a command to use for filtering, then runs the command and replaces the selected text with the result.

Some sample operations:

  • Sort lines alphabetically/numerically: sort or sort -n
  • Change to lowercase: tr "[:upper:]" "[:lower:]"
  • Replace a spelling mistake, taking care of case: sed -E 's/([tT])eh/1he/g'
  • Re-order elements in a tab- or comma-separated list: awk '{print $2 $1}' or awk -F, '{print $2 "," $1}'

Filter through Shell Command service

Put it in Library/Services, and it should appear in the ‘Services’ menu.

Filter through Shell Command.zip

Read More

The Making of Talkie: Multi-interface broadcasting and multicast

Part 2

TalkieTalkie is my newest product, a Walkie Talkie for iPhone and Mac.

In Part 1 of this series, I wrote about basic broadcasting. This works fine with one network device, but it’s worth discussing how to send through all devices, so you can communicate with others connected via, say, Ethernet and WiFi simultaneously.

So, in Part 2 I’ll write about the approach I took in Talkie for broadcasting from all network devices (a.k.a. network interfaces), so that one can communicate with others connected via WiFi, Ethernet (on a Mac), and any other network devices simultaneously.

Read More

Browsing Core Data databases using F-Script

F-Script, the Cocoa-based scripting environment, now provides some great tools for exploring Core Data databases.

I couldn’t figure out how to easily open up my databases, other than manually creating a managed object model, then a persistent store coordinator, then a managed object context on the console. I couldn’t find any existing tools, and I wanted a quick workflow for opening up my databases, so I put together a script that prompts for the application bundle or .xcdatamodel(d) data model file, then prompts for the XML (.xml), binary (.binary) or SQLite (.sql or anything else) database file, and opens up the inspector.

I wrote it as an Applescript that just calls upon F-Script to evaluate the script, and saved it in an application bundle so I can pull it up quickly.

Here it is:

Core Data Browser.app

201004101417.jpg

It just needs the F-Script app to be available.

Upon opening, the managed object context is available on the console as “context“. So, aside from using F-Script’s object browser, you can also do things like:

> request := (NSFetchRequest alloc) init
> request setEntity:(NSEntityDescription entityForName:'MyEntity' inManagedObjectContext:context)
> request setPredicate:(NSPredicate predicateWithFormat:'type = 3')
> result := context executeFetchRequest:request error:nil
> result
_PFArray { (entity: MyEntity; id: 0x20064c9e0  ; data: ), 
 (entity: MyEntity; id: 0x20064c9c0  ; data: ), 
 (entity: MyEntity; id: 0x200651180  ; data: )
...

> request := (NSFetchRequest alloc) init > request setEntity:(NSEntityDescription entityForName:'MyEntity' inManagedObjectContext:context) > request setPredicate:(NSPredicate predicateWithFormat:'type = 3') > result := context executeFetchRequest:request error:nil > result _PFArray { (entity: MyEntity; id: 0x20064c9e0 ; data: ), (entity: MyEntity; id: 0x20064c9c0 ; data: ), (entity: MyEntity; id: 0x200651180 ; data: ) ...

Update: Now has better error reporting, and the option to load classes from a bundle.

For those interested, here’s the original F-Script:

Read More

Easy rounded corners on UITableViewCell image view

Here’s a relatively easy way to achieve rounded corners on the standard image view in a UITableViewCell:

cell.imageView.layer.masksToBounds = YES;
cell.imageView.layer.cornerRadius = 5.0;

cell.imageView.layer.masksToBounds = YES; cell.imageView.layer.cornerRadius = 5.0;

Set this up when you create the cell (make sure you #import at the top, of course). It would appear the UIImageView control creates sublayers to display the actual image content, which is why we use the masksToBounds property to then clip any sublayers.

I noticed a lot of people are seeking answers to the silly behaviour of UITableView with the grouped (UITableViewStyleGrouped) style and images:

Images not clipped to rounded cell border

Images don’t get clipped to the rounded cell border, which looks nasty. This technique is one way to remedy that:

Rounded borders now stay within rounded cell edge

One caveat – due to the inexplicable way the image view within the table view cell scales image content, there’s not really a simple, sensible way to provide an inset margin from the table view cell boundary to complement this rounded border effect.

I tried setting the frame property of the UIImageView itself (cell.imageView.frame), as well as setting the frame of the image view’s layer. I also tried applying a scale transform to the layer, with strangely inconsistent results: Setting scale to, say, 50%, made the image view 40x40px, only a pixel or two smaller than the full size. This may be because another entity (the table view cell?) performs scaling of the content, instead of the actual image view; given that my original image was 80×80, a 50% scale would result in 40×40.

My solution was to steer clear of that nonsense and just provide appropriately scaled images straight to the image view. Here’s a simple category on UIImage to scale an image:

@interface UIImage (TPAdditions)
- (UIImage*)imageScaledToSize:(CGSize)size;
@end
 
@implementation UIImage (TPAdditions)
- (UIImage*)imageScaledToSize:(CGSize)size {
    UIGraphicsBeginImageContext(size);
    [self drawInRect:CGRectMake(0, 0, size.width, size.height)];
    UIImage *image = UIGraphicsGetImageFromCurrentImageContext();
    UIGraphicsEndImageContext();
    return image;
}
@end

@interface UIImage (TPAdditions) - (UIImage*)imageScaledToSize:(CGSize)size; @end @implementation UIImage (TPAdditions) - (UIImage*)imageScaledToSize:(CGSize)size { UIGraphicsBeginImageContext(size); [self drawInRect:CGRectMake(0, 0, size.width, size.height)]; UIImage *image = UIGraphicsGetImageFromCurrentImageContext(); UIGraphicsEndImageContext(); return image; } @end

So, then I just do something like this in the UITableView data provider:

UIImage *image = account.image;
if ( image ) {
   cell.image = [image imageScaledToSize:CGSizeMake(38, 38)];
}

UIImage *image = account.image; if ( image ) { cell.image = [image imageScaledToSize:CGSizeMake(38, 38)]; }

Sorted

Sorted.

Read More

The Making of Talkie: Broadcasting

Part 1

TalkieTalkie is my newest product, the result of a collaboration with a good designer friend, Tim Churchward, who did the user interface.

Talkie is a little different from many of the other walkie talkie applications on the App Store (aside from the fact that much of it was written by me from our motorhome in Tunisia!), and I thought I’d write a little about some of the tech underpinning the app, and some of the choices we made. Along the way it may get a little tutorial-esque.

  • This first part will introduce our initial motivations, and will talk about basic broadcast communications — the broadcast communications part may be very familiar to some, in which case it may be worth skipping to the next instalment.
  • In the second part, I’ll continue the theme of networking, and will talk about what I ended up with for Talkie’s network code after addressing a couple of things, including switching to multicast.
  • Finally, I’ll talk audio, dual platform development, and anything else I think of along the way (Actually, I’m aching to talk about one particular upcoming feature that had me jumping up and down when I first thought of it, but for now, mum’s the word on that one.)
Read More

Hi! I'm Michael Tyson, and I run A Tasty Pixel from our home in the hills of Melbourne, Australia. I occasionally write on a variety of technology and software development topics. I've also spent 3.5-years travelling around Europe in a motorhome.

I make Loopy, the live-looper for iOS, Audiobus, the app-to-app audio platform, and Samplebot, a sampler and sequencer app for iOS.

Follow me on Twitter.

Posts pagination

« 1 … 20 21 22 … 36 »
© 2021 A Tasty Pixel.