Using Quicksilver with iTunes Using Quicksilver with iTunes
  • Home
  • Posts
  • Home
  • Posts

Using Quicksilver with iTunes

200710151014I tend to play a fair bit of music while I’m working; sometimes I want to hear something in particular, and sometimes I’m happy to just let the shuffle do it’s thing (although some tracks I’ll skip).

Quicksilver makes all this really easy when used in combination with iTunes’ Party Shuffle. Firstly, I have the iTunes module installed in Quicksilver. Then, I’ve set up the hotkeys Ctrl-Shift-Left/Right for prev/next track, and Ctrl-Shift-Space for pause, first, for quick skipping of tracks, mostly. Also, I have Ctrl-Shift-Up for Search Artists, which lets me quickly select an artist/album/track to play.

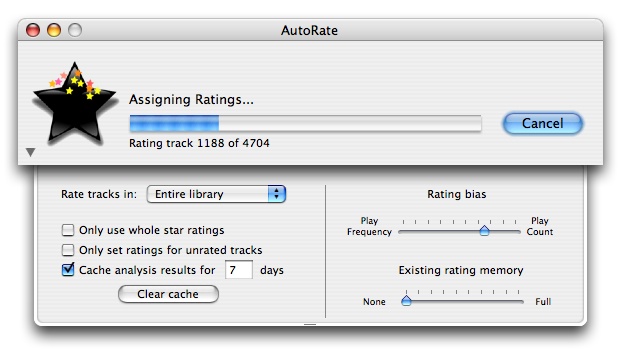
I get iTunes playing the Party Shuffle playlist, which does nice things like plays more popular tracks more often (although you have to rate tracks to make that work – try AutoRate).

When I want to hear something specific, I press Ctrl-Shift-Up, type an artist, select an album, perhaps, and hit enter – my default action is ‘Play in Party Shuffle’, which puts the selected tracks at the start of the shuffle playlist and starts playing. So, that music starts playing immediately, then, once it’s finished, iTunes goes back to shuffling tracks, so the music keeps coming without further intervention.

If I wanna just cue tracks, I can select music, then tab to the next field and press ‘n’, which jumps to ‘Play Next in Party Shuffle’ – that cues up the selected tracks for play after the current track finishes.

I can select more than one track using Quicksilver’s ‘comma’ trick, selecting an item, then pressing comma to add it to the list. If I’m searching for a particular track by name, I bring up Quicksilver the normal way (Ctrl-Space), type ‘tr’ to ‘Browse tracks’, right arrow, then type the track name.

Thus, I never have to do any mucking around searching through music using the mouse, and I can concentrate on whatever I’m doing, not selecting music.

Read More

Optimising performance for OS X

Ttp4A seemingly unavoidable trait of all operating systems is the notorious slow-down – it doesn’t seem to matter how nicely you treat the system, after a few months it’ll start grinding to a halt (or is it just me?). This has happened to me in Windows, Linux and OS X, and it drives me absolutely crazy. The only way I knew to go back to a zippy system was to reinstall the whole system, which is pain, pain, pain.

An operating system divides the filesystem up into fixed-size blocks, which it reserves for storing files – as many blocks are needed to store each file. When you delete a file, it clears the associated blocks for later use. However, this inevitably leads to free blocks being located all over the drive, not in one contiguous segment, and that means that for the next file, blocks have to be selected that are located far apart on the drive. That means when that file is read, the hard disk has to seek all over to be able to gather all pieces of the file – slow.

A popular maintenance task for Windows users is defragmentation – this takes all the used blocks on the drive, and clusters them all together at the start of the disk, so that blocks containing data for the same file are located together, and the free space is all together. That means the system has less work to do to read files.

I’d read in several places (including Apple’s documentation) that defragmentation (otherwise known as ‘disk optimization’) isn’t really necessary on Mac OS X and probably won’t make much difference. Bollocks!

I just performed a defrag using the excellent Tech Tool Pro 4, which took around 24 hours (yikes); it made a huge difference to the snappiness of the system, though – comparable to when I entirely reinstalled the OS.

So, I highly recommend it – don’t listen to the nay-sayers, this makes a big difference. Just make sure you have the time to let the machine chug away for a day. Alternatively, just do a few hours at a time – you can stop it, and continue later.

Read More

Inserting vector graphics in Office documents

Sometimes I have the misfortune of having to write conference papers in Microsoft Word, instead of a more civilised environment like LaTeX. Usefully, Word will refuse to import any kind of vector image format except for their own proprietary and crippled format, WMF/EMF. So, when it comes to diagrams, most people tend to throw their arms up and resort to bitmap formats like PNG. This, however, makes for large file sizes, or fuzzy printouts, so it’s a sub-optimal solution.

Although there are plenty of hoops to jump through, it is however possible to generate reasonable EMF files from other vector formats, which Word will accept. There are a large number of pitfalls, not least because of poor standards-adhesion when it comes to rendering of said formats. Mac OS X’s PDF renderer is no exception, unfortunately, so frequently one will have to resort to various bizarre conversion pipelines to have something readable at the other end.

That said, sometimes it works.

So, this is the procedure I’ve been following, to generate EMF figures from artwork created in a variety of applications, including XFig (which I personally don’t use, but my PhD supervisor Carlo enjoys), Inkscape, and OmniGraffle.

  1. Install pstoedit, a tool which will take a variety of formats (PDF/EPS, for example) and convert them to another – EMF, in particular.
    • This can be accomplished via Fink, for example, or DarwinPorts.
  2. Make sure the installed version supports EMF output – in Terminal, pstoedit -help | grep emf. If it doesn’t, you’ll need to find an other version elsewhere.
  3. If your diagram isn’t already in PDF or EPS format already, export it to one or the other.
  4. Try converting the PDF/EPS, as-is, as a first step. Some commands to try (open in Word/Powerpoint to see the result each time):
    • pstoedit -f emf diagram.pdf/eps output.emf
    • pstoedit -f emf -pta diagram.pdf/eps output.emf (Place letters individually, if text looks odd)
    • pstoedit -f "emf:-m" diagram.pdf/eps output.emf (Use Arial as font, if font looks wrong)
    • pstoedit -f emf -drawbb diagram.pdf/eps output.emf (Force drawing of bounding box – try this if you get cropping)
    • pstoedit -f emf -xscale 2 -yscale 2 diagram.pdf/eps output.emf (Scale up – use this if lines look blocky; experiment with larger values than 2)
    • pstoedit -f "emf:-m" -pta -drawbb diagram.pdf/eps output.emf (A combination of some of above)
  5. If your EMF version looks wrong, try exporting to EPS if you were using PDF, or PDF if you were using EPS – different renderers perform differently. Try above steps again on this new exported version.
  6. If this still doesn’t produce reasonable output, you’ll want to try another application that exports better-behaved PDF/EPS. You’ll need to import your diagram into such an application, make any cosmetic changes required to counteract any funny business as a result of the import, then export as PDF/EPS.
    • For a while, I was using Inkscape for this purpose, but I was still getting funny output sometimes.
    • I discovered a native OS X application called Intaglio, which seems to produce very good PDF output (not so much with EPS).
    • For either application, export your diagram in a format they can understand, to subsequently import.
      • Inkscape will basically only take SVG, from what I can remember. You can try converting the PDF/EPS to SVG using pstoedit again: pstoedit -f svg diagram.pdf/eps output.svg
      • Intaglio will happily take PDF and let you convert it to an editable format, which will work some of the time, with a reasonably well-behaved PDF. Drag the PDF onto the canvas, select it, then use Object, Convert, PDF for Editing.
    • Fix any visual problems caused by the import, using the application’s editing tools.
    • Export your diagram in PDF/EPS (try both, if necessary)
      • Intaglio seems to work best with PDF: Select the figure, then File, Save Selection As, select PDF and Crop to Content Size.
  7. Once you’ve exported PDF/EPS, repeat step 4 to try to generate reasonable output.

The whole process is undoubtedly an ordeal, and requires serious dedication, but it would appear to be required if you want to generate vector graphics in a Word document. Lets hope the geniuses at Microsoft remember to add a PDF/etc importer into their next Office.

Read More

Multiple email aliases in Mail

I’ve always wanted to be able to send email from several different addresses – for official university stuff, I want to send from my Monash address; for personal mail, from my personal address. For Tzi Software-related stuff, from my Tzi Software address. Until now, I thought one had to create a separate account for every address. Not so!

Daniel discovered this tip from Craig Swanson: Use multiple email aliases in Apple Mail. Nice!

200709131750

Read More

AutoRate in Objective-C

I’m currently re-doing AutoRate in Objective-C. I’ve heard from a few users with very large libraries (20,000+) that the current version takes several hours to go through their entire library. Should be able to do much better than that in Obj-C instead of AppleScript.

Should give me more scope to do some other things as well, as I’m more comfortable with Obj-C than AppleScript. One feature I’m considering is live updating of ratings – AutoRate runs in the background and watches tracks that are played. That will yield the ability to form more accurate ratings, instead of having to use a couple of heuristics to ‘guess’.

So, stay tuned.

Read More

MacBook Pro (first ed) refusing to eject CD

I have a first edition MacBook Pro (asking for trouble), and I just had an interesting run-in with the optical drive. I put in an old burned CD with a paper label (stuck all the way down, mind you – no bits sticking out), and it was making some very odd noises, although it was recognised as a valid CD.

I thought I’d just eject it and take a look, to make sure the label was stuck down, etc – it ejected, and all looked fine. I put it back in, and then the drive just made odd noises, and tried to eject again.

This time, however, it started ejecting, then got stuck and swallowed the CD again – I didn’t even see the thing poking out of the drive. This process repeated several times before I restarted the computer, holding down the mouse button. That was no help, and just continued the same process all through the boot, and continued once the machine was finished booting – it would make odd grunting noises for about 20 seconds, then attempt to eject, obviously fail, then swallow the disc again and repeat the process.

This had happened before, but not nearly as bad – sometimes the drive won’t eject a cd; strangely enough, if I squeeze the CD tray (hands on top and bottom of the MBP and squeeze together), sometimes it’ll help the CD out. I was doing this for the 15th time or so, and finally about 5mm of the cd stuck out of the drive – before it sucked it back in (which it was going to do), I grabbed it and unceremoniously yanked it out of the drive.

Just to make sure all was well again, I put in another cd, and ejected it successfully.

So, if this happens to you, try squeezing the drive. Some other suggestions are here and here.

So, what is the deal with this? How is it that a supposedly high-quality piece of machinery like the MBP can so frequently choke on fairly inoffensive-looking discs? Ridiculous.

Read More

AutoRate 1.4.2

200706211020

Edit: Please see the official AutoRate product page for the latest version

Hot on the heels of 1.4.1, AutoRate 1.4.2 has just been released. It has a drawer instead of a separate preference pane, and the playlist selection has moved down there.

In addition, I’ve again tweaked the ratings – as there’s now a setting to select between play frequency and play counts, there appears to be little need for a log transform to hack the ratings (in fact, it caused problems for my library). So, it’s gone – let me know how it goes.

Read More

AutoRate 1.4.1

200706141747Edit: Please see the official AutoRate product page for the latest version

I’ve released version 1.4.1 of AutoRate, which now has the option to use just play counts to generate ratings, or a variable mixture of play counts and play frequencies.

As the use of play frequencies tends to bias towards new tracks (which have a high play average, as the track age is small), and the use of play counts tends to bias towards older tracks (which will have a higher play count because they are older), I’m hoping a combination of both techniques may lead towards fairer rating.

There’re also a few tweaks to the way that track skips are factored in to the rating, and the option to select how much effect the previous track rating has on the new rating.

Read More

Hi! I'm Michael Tyson, and I run A Tasty Pixel from our home in the hills of Melbourne, Australia. I occasionally write on a variety of technology and software development topics. I've also spent 3.5-years travelling around Europe in a motorhome.

I make Loopy, the live-looper for iOS, Audiobus, the app-to-app audio platform, and Samplebot, a sampler and sequencer app for iOS.

Follow me on Twitter.

Posts pagination

« 1 … 33 34 35 36 »
© 2021 A Tasty Pixel.